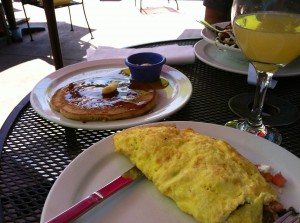
This weekend I finally made it to Zada Janes for brunch with my boyfriend, on my quest to try all the great brunch places in Charlotte. Zada Janes is located on Central Avenue, in the heart of Plaza Midwood. Their focus is brunch, but the also serve lunch and dinner. I ordered the Belvedere, an omelette stuffed with spinach, goat cheese, roasted garlic, mushrooms, and tomatoes. Also, a pancake to satisfy my sweet tooth. Oh, and a mimosa of course! The omelette was very good, although I think it needed a little more spice to it, or maybe more goat cheese. The pancake was divine, served with honey butter; it had a delicious flavor to it beyond just the pancake flavor, maybe a bit of vanilla.

Zada Janes pancake & omelette
Since Bella (my pup) was along, we were seated outside. It was a beautiful day, perfect for patio brunch. There were many, many dogs of all shapes and sizes in the patio. Zada Janes gets an A+ for dog-friendliness. Not only did we have an amazing brunch, Bella got to socialize as well!

Brunch with the gang
Inspired by an invitation to a cookie exchange, I decided to get creative with my exchange contribution. Just cookies? No, I was going to bring chocolate-dipped pretzels in decorative baggies tied with ribbons! With this festive image in mind, I embarked on a 5-hour pretzel project. Now, the process shouldn’t take that long unless like me, you decide to make 140 chocolate-dipped pretzels…what can I say, I got a little ambitious.
Here’s what you need:
- 1 bag pretzel rods
- 1 bag chocolate chips (my personal favorite is white chocolate)
- colored sugar/sprinkles
- crock pot or double boiler
- wax paper
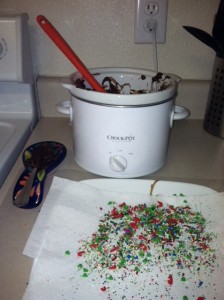
I used a crock pot to melt the chocolate, as it provides a nice even heat, and as long as it is kept on low heat and monitored, it should stay at a smooth melted consistency. I found that it worked best to switch the heat off at intervals so the bottom of the chocolate didn’t get burned. Also, the most effective way to get quality melted chocolate was to melt one bag at a time and use a silicone basting brush to “paint” the pretzel rods. After painting the chocolate on each pretzel, I dusted with sprinkles. To contain the excess sprinkles, I laid a paper towel over a large plate and did the sprinkling over it. See below for setup:

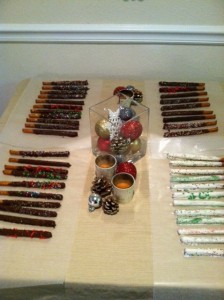
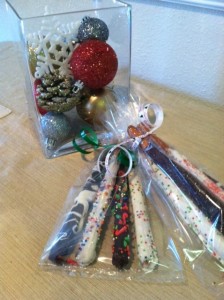
Almost done…all that’s left is to wait for the chocolate to harden and finish the final step, packaging! I set the pretzels on wax paper to dry. It worked fairly well for most of the pretzels, but some that had excess chocolate ended up with a large, flattened chocolate side. Wire racks might be a better option. Also, the white chocolate pretzels dried much faster than the semi-sweet chocolate pretzels. After waiting about 4 hours for the latter to harden, I finally put them in the refrigerator for half an hour to speed up the process. For the final step I used clear plastic treat bags (Target) and ribbon.
So…many…pretzels…but such a festive finished product!


Thanks for stopping by! A Wisconsin Badger gal at heart, I’m looking forward to using this site to share my journey in my adopted city of Charlotte. I am eager to offer insights and observations about my profession, hobbies, and travels!


 Follow


